Create a slide master in PowerPoint
Create a slide master in PowerPoint
PowerPoint 2013
A slide master is the top slide in a hierarchy of slides that stores information about the theme and slide layouts of a presentation, including the background, color, fonts, effects, placeholder sizes, and positioning. To create a master slide:
On the View tab, click Slide Master. In Slide Master View, the slide master appears at the top of the thumbnail pane with related layouts beneath it.
Click to select the master slide, then click Master Layout on the Slide Master tab.
Make the updates that you want.
To remove any built-in slide layouts that accompany the default slide master, in the slide thumbnail pane, right-click each slide layout that you want to delete, then click Delete Layout.
To set the page orientation for all of the slides in your presentation, on the Slide Master tab, click Slide Orientation, then click either Portrait or Landscape.
On the File tab, click Save As.
In the File name box, type a file name.
In the Save as type list, click PowerPoint Template, then click Save.
Import a customized Quick Access Toolbar
You can import customization files to replace the current layout of the ribbon and Quick Access Toolbar. By being able to import the customization, you can keep Microsoft Office programs looking the same as your coworkers or from computer to computer.
Important: When you import a ribbon customization file, you lose all prior ribbon and Quick Access Toolbar customizations. If you think that you might want to revert to the customization you currently have, you should export them before importing any new customizations.
Click the File tab.
Under Help, click Options.
Click Quick Access Toolbar.
Click Import/Export, and then click Import customization file.
For more information about how to customize the ribbon, see Customize the ribbon in Office.
Why am I seeing a green ball?
You see a green ball if you added a custom group or command to the Quick Access Toolbar after you customized the ribbon, but didn't assign an icon to represent that custom group or command.
The icon is used if you do the following:
Add the custom group to the Quick Access Toolbar.
To help differentiate between your own customized ribbon and the default ribbon.
Add an icon to represent the custom group or command
Click the File tab.
Under Help, click Options.
Click Customize Ribbon.
In the Customize the Ribbon window, under the Customize the Ribbon list, click the custom group or command that you added.
Click Rename, and then in the Symbol list, click an icon.
In the Rename dialog box, click OK.
To see and save your customizations, click OK.
Go to a slide when delivering your presentation
As you deliver your presentation, here is how to move from one slide to the next, move to a previous slide, or move to a specific slide anywhere in the presentation. For information about moving slides or changing the order of slides in your presentation, see the article Add, rearrange, duplicate, and delete slides in PowerPoint.
Go to the next slide
Press the Right arrow key.
Mouse: Click once anywhere on a slide to move to the next one.
Note: If you have a custom animation effect on your slide, clicking the slide starts the animation effect, rather than moving to the next slide. Use Go to a specific slide below to move to a specific slide and avoid triggering the animation effect.
Go to the previous slide
Press the Left arrow key.
Mouse: Right-click a slide, and then click Previous on the shortcut menu.
Note: If you have a custom animation effect on your slide, clicking the slide starts the animation effect, rather than moving to the next slide. Use Go to a specific slide below to move to a specific slide and avoid triggering the animation effect.
Go to a specific slide
Type the slide number, then press Enter.
Mouse (version 2013 or newer): Right-click a slide, select See All Slides, and then click the slide you want to display to the audience.
Mouse (versions 2010, 2007): Right-click a slide, point to Go to Slide, and then click the slide you want to display to the audience.
Go to the beginning of a presentation
Press the Home key on the keyboard.
Mouse (version 2013 or newer): Right-click a slide, select See All Slides, and then click the first slide in the set.
Mouse (versions 2010, 2007): Right-click a slide, point to Go to Slide, and then click the first slide in the list.
Go to the end of a presentation
Press the End key on the keyboard.
Mouse (version 2013 or newer): Right-click a slide, select See All Slides, and then click the last slide in the set.
Mouse (versions 2010, 2007): Right-click a slide, point to Go to Slide, and then click the last slide in the list.
Rehearse the presentation
Select Slide Show > Rehearse Timings.
Select Next, click the mouse or press the Right Arrow key to go to the next slide.
The time for the current slide is shown to the right of the Pause icon. The time to the right of that is the time for the whole presentation.
Select Pause to pause the recording. Select Resume Recording to resume.
Select Yes to save the slide timings, or No to discard them.
You can also press Esc to stop the recording and exit the presentation.
View the timings
Select View > Slide Sorter. The amount of time allotted to a slide is shown at the bottom-right of the slide.
Turn off recorded slide timings before you give a presentation
To prevent slides from automatically advancing, use the recorded slide timings as follows:
Select Set Up > Slide Show.
Clear the Use Timings or Use Rehearsed Timings check box.
To turn the slide timings on again, select Use Timings.
Add a hyperlink to a slide
Link to a website
Select the text, shape, or picture that you want to use as a hyperlink.
Select Insert > Hyperlink.
Select Existing File or Web Page, and add the:
Text to display: Type the text that you want to appear as hyperlink.
ScreenTip: Type the text that you want to appear when the user hovers over the hyperlink (optional).
Current Folder, Browsed Pages, or Recent Files: Select where you want to link to.
Address: If you haven't already selected a location above, insert the URL for the web site you want to link to.
If you link to a file on your computer, and move your PowerPoint presentation to another computer, you'll also need to move any linked files.
Link to a place in a document, new document, or email address
Select the text, shape, or picture that you want to use as a hyperlink.
Select Insert > Hyperlink and select an option:
Place in This Document: Link to a specific slide in your presentation.
Create New Document: Link from your presentation to another presentation.
E-mail Address: Link a displayed email address to open up a user's email program.
Fill in the Text to display, ScreenTip, and where you want to link to.
Select OK.
Change the color of a hyperlink
You can change the color of a hyperlink if you like. If you want to change the display text of a link, right-click it and select Edit Link.
Select the hyperlink you want to re-color.
On the Home tab of the ribbon, select down arrow next to the Font Color button to open the menu of colors.
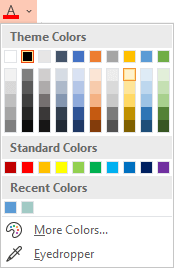
Select the color you want for the hyperlink.
Test the hyperlink
Once you've inserted the link, you can test it (in Normal view) by right-clicking the hyperlink and selecting Open Hyperlink.
Show and return
The Show and return box is grayed out unless you are linking to a Custom Show in your presentation.
- Open your presentation.
- On the Slide Show tab, click the From Beginning button. ...
- Click to move to slide 2.
- Press the spacebar to move to slide 3.
- Press the right-arrow key to move to slide 4.


Comments
Post a Comment