Simple rules for better PowerPoint presentations
General Program Shortcuts
- Ctrl+N: Create a new presentation.
- Ctrl+O: Open an existing presentation.
- Ctrl+S: Save a presentation.
- F12 or Alt+F2: Open the Save As dialog box.
- Ctrl+W or Ctrl+F4: Close a presentation.
- Ctrl+Q: Save and close a presentation.
- Ctrl+Z: Undo an action.
- Ctrl+Y: Redo an action.
General Program Shortcuts
First, let’s review some general keyboard shortcuts for opening, closing, and switching between presentations, as well as navigating the Ribbon.
- Ctrl+N: Create a new presentation
- Ctrl+O: Open an existing presentation
- Ctrl+S: Save a presentation
- F12 or Alt+F2: Open the Save As dialog box
- Ctrl+W or Ctrl+F4: Close a presentation
- Ctrl+Q: Save and close a presentation
- Ctrl+Z: Undo an action
- Ctrl+Y: Redo an action
- Ctrl+F2: Print Preview View
- F1: Open the Help pane
- Alt+Q: Go to the “Tell me what you want to do” box
- F7: Check spelling
- Alt or F10: Turn key tips on or off
- Ctrl+F1: Show or hide the ribbon
- Ctrl+F: Search in a presentation or use Find and Replace
- Alt+F: Open the File tab menu
- Alt+H: Go to the Home tab
- Alt+N: Open the Insert tab
- Alt+G: Open the Design tab
- Alt+K: Go to the Transitions tab
- Alt+A: Go to the Animations tab
- Alt+S: Go to the Slide Show tab
- Alt+R: Go to the Review tab
- Alt+W: Go to View tab
- Alt+X: Go to the Add-ins tab
- Alt+Y: Go to the Help tab
- Ctrl+Tab: Switch between open presentations
Selecting and Navigating Text, Objects, and Slides
You can use keyboard shortcuts to navigate throughout your presentation easily. Try these shortcuts for quick and easy ways to select text within text boxes, objects on your slides, or slides in your presentation.
- Ctrl+A: Select all text in a text box, all objects on a slide, or all slides in a presentation (for the latter, click on a slide thumbnail first)
- Tab: Select or move to the next object on a slide
- Shift+Tab: Select or move to the previous object on a slide
- Home: Go to the first slide, or from within a text box, go to the beginning of the line
- End: Go to the last slide, or from within a text box, go to the end of the line
- PgDn: Go to the next slide
- PgUp: Go the previous slide
- Ctrl+Up/Down Arrow: Move a slide up or down in your presentation (click on a slide thumbnail first)
- Ctrl+Shift+Up/Down Arrow: Move a slide to the beginning or end of your presentation (click on a slide thumbnail first)
Formatting and Editing
The following keyboard shortcuts will save you time so you can edit and format in a snap!
- Ctrl+X: Cut selected text, selected object(s), or selected slide(s)
- Ctrl+C or Ctrl+Insert: Copy selected text, selected object(s), or selected slide(s)
- Ctrl+V or Shift+Insert: Paste selected text, selected object(s), or selected slide(s)
- Ctrl+Alt+V: Open the Paste Special dialog box
- Delete: Remove selected text, selected object(s), or selected slide(s)
- Ctrl+B: Add or remove bold to selected text
- Ctrl+I: Add or remove italics to selected text
- Ctrl+U: Add or remove underline to selected text
- Ctrl+E: Center a paragraph
- Ctrl+J: Justify a paragraph
- Ctrl+L: Left align a paragraph
- Ctrl+R: Right align a paragraph
- Ctrl+T: Open the Font dialog box when text or object is selected
- Alt+W,Q: Open the Zoom dialog box to change the zoom for the slide
- Alt+N,P: Insert a picture
- Alt+H,S,H: Insert a shape
- Alt+H,L: Select a slide layout
- Ctrl+K: Insert a hyperlink
- Ctrl+M: Insert a new slide
- Ctrl+D: Duplicate the selected object or slide (for the latter, click on a slide thumbnail first)
Helpful Slideshow Shortcuts
When you’re ready to start a presentation, the following keyboard combos should come in handy.
- F5: Start the presentation from the beginning
- Shift+F5: Start the presentation from the current slide (this one is great when you want to test out how the slide your currently working on will look in your presentation)
- Ctrl+P: Annotate with the Pen tool during a slideshow
- N or Page Down: Advance to the next slide during a slideshow
- P or Page Up: Return to the previous slide during a slide show
- B: Change the screen to black during a slideshow; press B again to return to the slideshow
- Esc: End the slideshow
7 Easy PowerPoint Tips to Save Time and Sanity
Whether you like it or not, PowerPoint is the most widely used presentation tool in the world. It is a necessary medium of communicating in business. Creating presentations can be tedious and time consuming. Making 5-6 mouse clicks to perform a single task over and over is inefficient. There has to be a better way.
Here are 7 easy tips that will save you time and take some of the pain points out of PowerPoint.
Note: The below images are from PowerPoint 2016, the location of the images may vary slightly between versions.
1. Create Your Own Custom Ribbon or Add Features to the Quick Access Toolbar
PowerPoint has its set features and ribbon layouts for the casual user, but that’s not you. You’re a heavy user, you deserve better. Customizing your toolbar to include your most commonly used functions will save you an enormous amount of time navigating PowerPoint. It may seem like a daunting task, but trust us, it will take you 2-10 minutes and save you hours.
How to add features to the Quick Access Toolbar:
Click on the dropdown in the Quick Access Toolbar and select More Commands.

- Select your desired command, click Add and repeat for your most commonly used tools.
Click OK when finished.

How to create a custom ribbon:
Right click on or near any of the ribbons (e.g. Home, Insert, Design, etc.) and click on Customize the Ribbon.

You can create a completely new Tab (e.g. Home, Insert, Design), or Groups (e.g. Clipboard, Slides, Font) within existing Tabs.

- Select your desired command, click Add and repeat for your most commonly used tools.
- Click OK when finished.
Here is an example of some commonly used features to add to your custom Tab.

Users can also add the below recommended command buttons to the Custom Quick Access Toolbar or Personalized Ribbon in PowerPoint.
2. Pick Up / Apply Object Style – The Better Format Painter
Format Painter is the default “go to” tool for users to quickly take the format from one object (Font Type, Font Style, Size, Color, Indentation, etc.) and apply to another object; however, Pick Up Style / Apply Object Style is a hidden gem that is a much more versatile tool that will save you time.
Pick Up Style / Apply Object Style lets you select formatting from almost any object within PowerPoint and save it until you want to apply the format. This function is more efficient compared to Format Painter for several key reasons:
- Continue Working: When using Format Painter, users have to immediately apply the selected style to the new object. Pick Up Style / Apply Object Style allows users to grab a style, continue working in their presentation, and apply the style at a later time. This is especially helpful when grabbing formats from one slide that will be applied elsewhere in a presentation.
- Reuse the Format: It can be reused over and over again until a new style is set. Format Painter forces users to reselect a format each time they want to apply it to a new object. Too many clicks = too much wasted time.
- Eliminate Misplaced Clicks: It also eliminates the risk of the dreaded accidental or misplaced click that is all too common with using Format Painter. It’s amazing how easily you can miss the object that you want to apply a format to, forcing the user to start the process all over again. It’s a tedious task that nobody deserves to be subjected to.
How to use Pick Up / Apply Object Style:
Pick Up / Apply Object Style Shortcuts: The shortcuts are quite easy to remember as they are similar to Copy (Ctrl+c) and Paste (Ctrl+v):
- Pick Up Style: Ctrl+Shift+C
- Apply Style: Ctrl+Shift+V
3. Use Duplicate and Cut your Copy and Paste Time in Half
Even the novice user is aware of how to copy (Ctrl+c) and paste (Ctrl+v) an object in PowerPoint. A quick copy paste takes seconds, but these seconds add up over the course of a deck, a day, or a year. Duplicate is fast tool that will save you time and maybe even minimize your chances of Carpal Tunnel…
Users can Duplicate an object or multiple objects at a time two ways:
- Using your Mouse:
- Select the object.
- Hold down the Ctrl key.
- Drag a duplicate to its new position.
- Simply select the object(s) and press Crtl+d.
4. Use the Eyedropper when possible, but know your Company’s RGB Codes
Pick Up / Apply Object Style does a great job of transferring colors from object to object; however, there are times when you will need to pull colors from company logos or other pictures, which the Eyedropper does.
To use the Eyedropper:
- Select the object or specific text you want to change the color of.
Select the Eyedropper shown below.

- Click on the image or text you would like to copy the color from – the originally selected object or text will automatically change to color that was selected.
In order to save time, it is always helpful to memorize or have written down the 2-3 most commonly used RGB color codes for your business. When all else fails, you can simply:
- Highlight an object or text that you would like to change.
Select More Colors as shown in the image below.

Enter the RGB code you wish to apply.

- Click OK.
5. Pin Frequently Used Folders Presentations to Save Time Searching Through a Maze of Folders
Let’s face it, we spend a lot of time clicking through folders to find commonly used files, wasting time navigating folder structures for a commonly used file or template. File, Open, Browse, locate your drive, and search through 10 sub folders to find the template you use 5 times a week is torture. Pinning your most commonly used folders or files to PowerPoint will save you from the monotony of clicking through folders time and time again.
- When PowerPoint is open, click on the File ribbon, then Open.
Right click on the Presentation or Folder you want to pin and select Pin to List.

6. Set a Default – Have PowerPoint Open the Same Way Every Time
Ever wonder why PowerPoint seems to open in a different view almost every time you open a file, especially when the file is shared between many users? This is because PowerPoint opens a presentation using the last view option saved. You can stop the annoying and tedious process of adjusting the view every time you open a file by setting a default view.
- Click the File tab and choose Options in the left pane.
- Select Advanced in the left sidebar.
- In the bottom of the Display section, you will see the last line titled Open all documents using this view and open the drop down list.
- Choose your preference. Note: Normal – thumbnails and slide and Normal – thumbnails, notes, and slide are two of the most common views.
Click OK.

7. Select Groups of Objects Using the Selection Pane–Stop Driving Yourself Crazy Accidentally Unselecting Groups of Objects
Trying to select groups of objects on a complex slide might as well require a microscope. Holding Ctrl and clicking on each individual object not only takes time, but also is often met with accidental clicks that select/unselect unintended objects. Selecting objects by dragging the mouse is inaccurate. Use the Selection Pane to quickly and accurately select groups of objects.
On the Home ribbon, open the Select drop down and click Selection Pane.

A right sidebar will open displaying all the object on your slide. Select multiple objects by holding Ctrl and clicking multiple objects in the sidebar.

Even the PowerPoint masters need help sometime—check out Astute Review, the most powerful PowerPoint review and formatting tool on the planet. With one click you can review and format entire PowerPoint presentations for consistency and save time, money and most importantly, your sanity. Want to learn more about how one click can save your day? Sign-up for a free hands-on look at Astute Review.
Simple rules for better PowerPoint presentations
Have you ever given a PowerPoint presentation and noticed that something about it just seemed a little … off? If you’re unfamiliar with basic PowerPoint design principles, it can be difficult to create a slide show that presents your information in the best light. Poorly designed presentations can leave an audience feeling confused, bored, and even irritated. Review these tips to make your next presentation more engaging.
Don't read your presentation straight from the slides
If your audience can both read and hear, it’s a waste of time for you to simply read your slides aloud. Your audience will zone out and stop listening to what you’re saying, which means they won’t hear any extra information you include. Instead of typing out your entire presentation, include only main ideas, keywords, and talking points in your slide show text. Engage your audience by sharing the details out loud.
Follow the 5/5/5 rule
To keep your audience from feeling overwhelmed, you should keep the text on each slide short and to the point. Some experts suggest using the 5/5/5 rule: no more than five words per line of text, five lines of text per slide, or five text-heavy slides in a row.

Don't forget your audience
Who will be watching your presentation? The same goofy effects and funny clip art that would entertain a classroom full of middle-school students might make you look unprofessional in front of business colleagues and clients. Humor can lighten up a presentation, but if you use it inappropriately your audience might think you don’t know what you’re doing. Know your audience, and tailor your presentation to their tastes and expectations.
Choose readable colors and fonts
Your text should be easy to read and pleasant to look at. Large, simple fonts and theme colors are always your best bet. The best fonts and colors can vary depending on your presentation setting. Presenting in a large room? Make your text larger than usual so people in the back can read it. Presenting with the lights on? Dark text on a light background is your best bet for visibility.

Don't overload your presentation with animations
As anyone who’s sat through a presentation while every letter of every paragraph zoomed across the screen can tell you, being inundated with complicated animations and exciting slide transitions can become irritating. Before including effects like this in your presentation, ask yourself: Would this moment in the presentation be equally strong without an added effect? Does it unnecessarily delay information? If the answer to either question is yes—or even maybe—leave out the effect.
Use animations sparingly to enhance your presentation
Don’t take the last tip to mean you should avoid animations and other effects entirely. When used sparingly, subtle effects and animations can add to your presentation. For example, having bullet points appear as you address them rather than before can help keep your audience’s attention.
Three tips for beautiful PowerPoint presentations
In an earlier lesson, we gave you some tips for improving PowerPoint presentations. These simple rules covered the basics of making your PowerPoint slides readable and interesting. If you know how to do this, your presentations are probably already pretty strong.
That said, for a presentation to really stand out it also has to look great. Don't worry, you don't have to be a graphic designer to create something that looks sharp. These simple tips will make a big difference in any presentation—and all three are pretty easy to follow.
Highlight large images
Many PowerPoint slides include placeholders for inserting images. Most of these placeholders are pretty small in comparison to the entire slide. While using these placeholders lets you place text alongside your pictures, it can also detract from the power of your images and make all of your slides look the same. If your presentation includes important images, try making them cover the entire slide. While you won't be able to include much text on these slides, displaying the right image can be an effective tool to reinforce an important point in your presentation.

One word of warning: This only works if your images are large enough. In order for the image to display at full quality, it has to have the same resolution—or number of pixels—as your display. Otherwise, the image may look stretched or blurry.
Use interesting fonts
You might already be familiar with PowerPoint's theme fonts. Each PowerPoint theme includes a pair of fonts—one for headings and titles, and another for bullet points and paragraph text. Including more than one font is key to making your slides look well-designed. However, many of the default font pairs are a little bland. Why not use some different fonts?
Websites like DaFont and Font Squirrel have thousands of beautiful fonts you can download for free, and the Internet is filled with resources to help you learn how to choose which fonts to use. You can even find plenty of suggestions for font pairings that work well (Google font pairings for more ideas). Once you've found some fonts you like, you can even customize PowerPoint theme fonts to include your favorites.
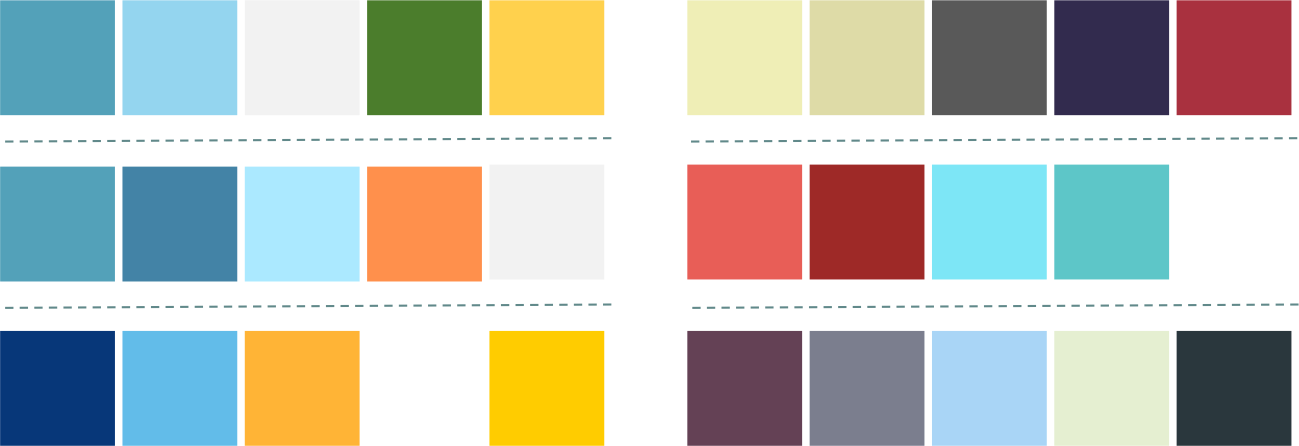
Create your own color scheme
PowerPoint themes also include premade sets of colors. Like the fonts pairings, many of these color sets are a little bland. Why not use some colors you really like? Colour Lovers is a great resource for modern color palettes that looks great. You can also copy the colors in an ad or illustration that you like. Don't use more than four or five main colors, or your presentation will look busy and disorganized. Just like with theme fonts, you can also create custom theme colors. Here are some color combinations we've used for presentations at our office:
3 tips for beautiful presentations in PowerPoint
In the past, we've written about general rules for making your PowerPoint presentations more readable and engaging. We've also covered tips for making beautiful, interesting-looking presentations. All of this advice is pretty general and after all, if you follow good design practices, you can make great-looking presentations in any version of PowerPoint.
That said, if you've already upgraded to Microsoft 365, you'll find that making beautiful presentations is easier than ever. This is because PowerPoint for Microsoft 365 includes a handful of new theme and transition options. These options let you create professional-looking presentations quickly and without much customization.
Try bold themes
It's easy to fall into the habit of making the same type of presentation over and over again—for years, I always used very basic layouts and color schemes for PowerPoint simply because trying anything different felt like too much work. Using a well-designed theme can take a lot of the guesswork out of creating slides. It can also help you break out of your comfort zone and create a presentation that looks much different from anything you might have created on your own.
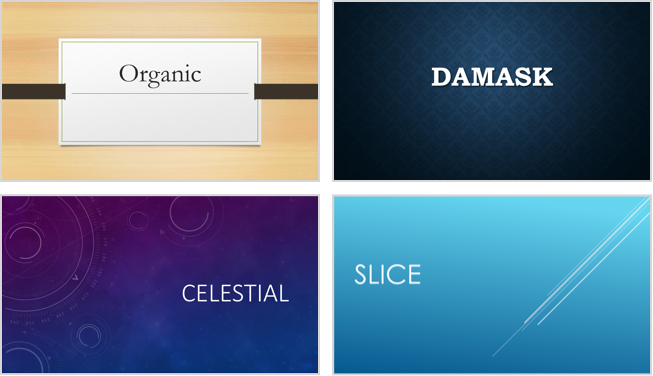
PowerPoint includes many themes that use bright colors, bold shapes, and textured backgrounds. Instead of sticking with the same layouts you've been using for years, why not experiment with some of these themes? Every theme won't be appropriate for every presentation, but you can probably find one that suits your content well. Here are a few of the best ones:
Use theme variants
If you've found a theme you like but want something a little different, try applying a theme variant. Applying a theme variant changes a few minor aspects of your theme's appearance. Some themes have variants that are only subtly different from the original, while other themes include variants with totally different color schemes and background images. In any case, it can be a great way to customize a presentation without a lot of work.

Use a transition that works with your presentation
As we've said before, you should avoid using excessively complicated transitions. For instance, anything that makes it look like your presentation is shattering, blowing in the wind, or zooming around the screen is probably a bad idea. However, there are some transition effects that work especially well with certain themes.
For instance, try downloading and playing this presentation that uses the Organic theme with a Push transition from right. Notice how the slides seem to all be connected? What about this one? It uses the Vapor Trail theme with the Pan transition. The text seems to move while the background stays the same.
There's no hard and fast rule for picking transitions—just play around with them until you find one that highlights your content and layout.
That's it! To learn how to modify themes, add transitions, and do more with PowerPoint 2016, check out our tutorial.
Lesson 20: Using the Format Painter in PowerPoint and Word
Using the Format Painter in PowerPoint and Word
Themes can be a great way to make your PowerPoint presentation or Word document look nice, but sometimes you might want to add custom design elements to your project. Custom formatting can be tedious, though, especially when you're doing a lot of it. For instance, take this PowerPoint slide. Let's say you've applied a border around the photo on the left, and now you'd like to do the same to the photo in the bottom-right corner.

You could try to remember all of the steps and apply the effect to the next photo as well—or you could save some time and use the Format Painter. The Format Painter is a tool in Word and PowerPoint that lets you copy some formatting from one object and apply it to another one. Think of it as copying and pasting for formatting.
For more information on what Format Painter can be used for, you can visit their Microsoft Support page.
Using the Format Painter
- Select the object with the formatting you want to copy.

- Click the Format Painter icon. It may be located in a slightly different place, depending on your version of Office, but it always looks like a paintbrush.

- Select the object you want to apply the formatting to. The object will be formatted.

See? Simple! That was much quicker than applying the individual effects one at a time. If you want, you can even use the Format Painter to apply the formatting to multiple objects. Just double-click the Format Painter icon instead of clicking it once. The cursor will show up with a paintbrush next to it. Click the Format Painter icon again to return to a regular cursor.

Even though we only looked at using the Format Painter for photos in PowerPoint, you can use it for anything you can apply formatting to in Word or PowerPoint. This includes text, table cells, and shapes. Once you start using it, you'll be surprised how often it comes in handy.
The Ultimate Beginner’s Guide to Microsoft PowerPoint: From Newbie to Master
You will need to give a presentation one day. This beginner’s guide to Microsoft PowerPoint should give you a great start to a wonderful slideshow.

Microsoft PowerPoint has been a staple for creating presentations for many years. But like anything, not everyone is an expert right off the bat. You have to start somewhere, right? So, let this beginner's guide to PowerPoint be that first step.
For those beginner's who are using PowerPoint for the first time, haven't used it in a while, or just want a simple reference for the basics, this your guide to the desktop version. And, many of these same features apply if you use it online. So, if you are still deciding between PowerPoint Online and PowerPoint 2016, this guide can come in handy either way.
What Is Microsoft PowerPoint?
Microsoft PowerPoint is basically a presentation creation tool. You can make slideshows with text, images, shapes, animations, audio, and much more. Then, pop your presentation onto the big screen to display it to others or save it as a visual document for yourself.
"PowerPoint is a slideshow presentation program that's part of the Microsoft office suite of tools. PowerPoint makes it easy to create, collaborate, and present your ideas in dynamic, visually compelling ways."
For business, educational, and personal situations, PowerPoint offers the flexibility to make the simplest presentations stand out with its host of features.
General Uses for PowerPoint
- Business presentations for products and services
- Educational slideshows for classrooms and lectures
- Personal visuals such as mind maps and family photo slideshows
- Sales and marketing materials
- Event presentations like weddings, anniversaries, or family reunions
- Project, budget, and financial presentations
- Certificates, calendars, reports, diagrams, and charts for any industry
You can create almost any type of visual in PowerPoint. But first, you should become familiar with the general terms of the application.
Basic Terms Used in PowerPoint
You will see many words and terms used frequently throughout this guide. So, taking a moment to review them will help you follow the processes and explanations much easier.
Slideshow and Presentation: When talking about PowerPoint, you may see these two terms become interchangeable. They each represent the overall document you create in the application.
Slides: Each slideshow in PowerPoint contains slides, just like with a physical slideshow. You can think of slides as pages that you can add to your presentation and then move through them one-by-one.
Animations: Animations are visual effects that can give your slide a unique appearance. They allow you to add movement and pizzazz to the elements on your slide.
Transitions: Transitions are also visual tools, but you will see as one slide moves to the next. By using a transition, you can make your presentation stand out to your audience or use it to create a dramatic effect.
The Ribbon and Tabs in PowerPoint
Just like with other Microsoft Office applications, the PowerPoint ribbon contains the buttons that you will use inside tabs. You can customize the ribbon to remove or add both tabs and buttons. But, you will likely see the tabs below by default.

Here is a brief description of what each one is for and which tab group you can see.
- File: Create a new presentation, open an existing one, save, print, and share slideshows.
- Home: Control the clipboard, slides, font, paragraph, drawing, and editing.
- Insert: Insert slides, tables, images, illustrations, links, comments, text, and media.
- Design: Select a theme, pick a variant, customize slides, and get design ideas.
- Transitions: Choose a transition, preview it, adjust the effects, and add timing.
- Animations: Pick an animation, preview it, adjust the effects, use advanced features, and add timing.
- Slide Show: Start a slideshow, set one up, pick a monitor, and use presentation view.
- Review: Use tools for proofreading, accessibility, language, comments, and comparisons.
- View: Change the presentation view, adjust the master views, zoom in or out, select colors, and work with windows and macros.
You should also see the Help tab and Tell me what you want to do box. If you need assistance or want more information on a feature, just open Help or enter the keyword into the Tell me box and view your results.
The PowerPoint Quick Access Toolbar
Like the tabs and ribbon with other Microsoft Office products, you also have the Quick Access Toolbar. You might already be familiar with this handy tool, but if not, this is the toolbar at the very top left of the PowerPoint window. As the name implies, this feature allows you to perform quick actions.

The Save button lets you easily save the file you are working on with the current file name.
If you make a mistake and want to undo it, just click the Undo button. If you click it once, it will undo the last action you took. If you keep clicking it, it will undo each previous action by moving backward. Alternatively, you can click the arrow next to the Undo button and highlight all actions you want to undo.
If you undo an action with the button, the Redo button will then be clickable. This lets you redo what you have just undone. Like the Undo button, you can redo your last action with one click or use the arrow next to the Redo button to redo multiple actions.
The Presentation button lets you start your slideshow as it will be viewed by others. It should take up your entire screen for a nice view of the presentation at any time during your creating or editing processes.
You can select the arrow on the right of the Quick Access Toolbar to add or remove buttons from it easily. You can also see more commands available or move the toolbar below the ribbon.
How to Work With PowerPoint Slides
Slides are the foundations of your slideshows. So knowing the ins and outs of how to work with them effectively can have a big impact on your creation. Here are the basics you should know to work with your PowerPoint slides.
Add a PowerPoint Slide
On the Home tab, you should see a section on the ribbon for Slides. You can quickly add a slide by clicking the New Slide button. This will add a slide just like the one you have currently selected.
Alternatively, you can click the arrow on the New Slide button. This allows you to choose which type of slide you want to add such as a blank slide, a title with content, or a picture with caption.

Change the Layout of a Slide
The Layout button on your ribbon lets you change the type of the currently selected slide. So you can easily change a title slide to one with a title and content or a picture with caption slide to a content with a caption. Or you can get a slide ready for you to insert a PDF directly.
Slide Icons
Some slide types are easy to understand right from the start. For instance, if you choose a title slide, you will see the text areas instructing you to click to add your title and subtitle. But other slide layouts, like those that let you add media, contain icons for you to insert your content.
If you use this type of slide, just click the corresponding icon to insert your item.
- Insert Table: Create a table by choosing the number of columns and rows.
- Insert Chart: Create a chart with a variety of options like line, pie, bar, and area.
- Insert SmartArt graphic: Create a visual like a matrix, pyramid, or process diagram.
- Pictures: Insert an image from your computer.
- Online Pictures: Insert an image from the gallery or search the web for one.
- Insert video: Insert a video from a file, YouTube, or embed code.

You can also get more details on embedding YouTube videos or adding music to your PowerPoint presentations.
Delete a Slide
If you want to delete a slide, the simplest way is to select it and click Delete on your keyboard. You can also right-click on the slide and choose Delete Slide from the context menu.
Using PowerPoint Sections
You might want to organize your slideshow into different sections. Click the Section button, select Add Section, and then give it a name. You can then add slides separately within each section. The Section button arrow lets you also remove, rename, collapse, and expand sections.

Other Common Slide Actions
- Easily rearrange slides with a drag-and-drop action.
- Duplicate slides or create them from an outline using the New Slide button arrow or right-clicking and using the context menu.
- Return a slide to its default layout by clicking the Reset button or right-clicking and using the context menu.
Work With Presentation Notes
PowerPoint offers a terrific speaker note feature that can come in handy. You can add a note to a slide for your own reference or for speaking to your audience during a presentation. The note section appears directly below each slide within PowerPoint.
If you cannot see it, just click the Notes button in the task bar at the bottom of your PowerPoint window. Or, open the View tab and click the Notes button on your ribbon. Then, simply click inside the note section to add yours.

Using Notes in Your Presentations
When you present your slideshow to an audience, only you can see your notes. This makes it a great tool to hold your descriptions, explanations, or instructions as you present your slideshow. Here is the view that you will see containing your notes as you display your presentation.

Printing Your Presentation Notes
If you print your presentation so that your audience has a reference, you can include your notes if you like. To see how it will look, click the View tab and then Notes Page in the Presentation Views section of the ribbon.
If you would like to change how your notes look when you print them, click the Notes Master button in the Master Views section of the ribbon. This allows you to select the design, layout, and page setup options. Also, note the Handout Master button directly to the left which lets you customize the entire handout appearance as well.

Add Animation to PowerPoint
If you are considering adding animations to your slides, it's super easy to do. Animations can be effective for slideshows you create for education like classroom presentations or college lectures. They can also give your presentation a fun effect for personal slideshows like a family reunion or wedding display.
Animation Options
These are the basic features available on the Animations tab.
- Animation: Choose from a variety of options by clicking the arrow in the Animation You can apply an animation to an element when it enters or exits the slide, use it for emphasis, or give it a motion path.
- Effect Options: Different animations have extra options for you to pick from. For instance, the Wheel animation lets you pick the number of spokes while the Spin options lets you select the direction and amount of spins.
- Advanced Animation: Here you can add an animation, open the Animation Pane for more working room, set up a trigger, or use the Animation Painter. But for simple slideshow animations, the basic features should suit you fine.
- Timing: Decide how you want your animations to appear on the slide. They can start when you click during the presentation or right after or with the previous animation. You can also pick a duration time, delay time, and reorder your animations.
- Preview: Once you add an animation you can see a quick view of how it will look without exiting the editing mode or opening the presentation view.

Create Your First PowerPoint Animation
First, select the slide and then the element on the slide that you want to animate. Then, just pick the type from the Animation box. It's that easy! You can then use the tools described above to add effects, advanced items, or timing if you like.
Notice that when you add an animation to an element, a number appears next to it. Each animation you add will be numbered sequentially so that you can easily identify it, work with it, or reorder it. Remember to think of each animated element on its own. This means you can have multiple animations with their own effects all on the same slide.

If you use the Animation Pane on the right, the numbers make it simple to see one animation at a time. There, you can add the same types of effects that you see on the ribbon. Just click the arrow corresponding to the animation and a dropdown menu will appear.
And if you are inserting Excel charts into your presentation, you can animate those too.
Apply PowerPoint Transition Effects
Inserting transitions between your slides can be another effective way to keep your audience's attention, similar to animations. You can apply a unique visual, with or without sound, as you move through the slides of your presentation.
Transition Options
These are the basic features available on the Transitions tab.
- Transition to This Slide: Pick from the transition options by clicking the arrow in the box. You can apply a transition that is subtle, exciting, or dynamic. Keep in mind that this is the effect for transitioning to the current slide.
- Effect Options: Different transitions have extra options that you can apply. For example, the Wipe, Wind, and Orbit transitions let you pick the direction.
- Timing: Here you can add a sound to go with your transition, pick a duration time, and apply these items to all slides. In addition, you can decide to advance to the next slide upon your mouse click or automatically after a certain period of time.
- Preview: Once you add a transition you can see a quick view of how it will look without exiting the editing mode or opening the presentation view.

Create a Slide Transition
This works basically much the same way as the animation only with one step less. Simply select the slide and pick the transition. You can then optionally apply any of the above-described effects that you would like. Pretty easy, right?
While transitions, like animations, may not have their place in every type of slideshow, they can be eye-catching for casual gatherings or fun events. Even for business presentations, a simple Fade effect can eliminate a clunky transition between slides.
Use Different Presentation Views
Not everyone works the same way when it comes being creative. Luckily PowerPoint offers different built-in views to accommodate this. Just select the View tab and take a look at the ways in which you can work with your slideshow.
The Presentation Views section holds five unique ways to create or edit your slideshow. One of those is the Notes Page which you read about above. And, here are the other four with brief explanations.
- Normal: As you can probably guess, this is the basic, normal view. You should see your slides on the left as numbered thumbnails and the current slide in the largest section to the right. This view works well if you prefer to jump between slides visually.
- Outline View: For those who prefer to write or create using outlines, this view is ideal. You can write directly within the outline pane on the left or paste an existing outline from Microsoft Word directly in. Here again, the current slide is in the largest section to the right.
- Slide Sorter: This is a terrific way to see all of your slides at a glance. Taking up the entire center window, you can see each slide and can reorder them easily with a drag-and-drop action.
- Reading View: If you want to see your entire presentation without switching to full-screen mode, then just click this button. You can view your slideshow with animations and transitions easily.

Along with the Slide Sorter view, the Normal and Outline Views allow you to quickly reorder your slides. Just select one and then drag it to its new location.
Collaborate on PowerPoint Presentations
Like other Microsoft Office applications, you have features to easily collaborate with others on your PowerPoint presentations. So if your sales team, fellow educators, or classmates will work on the slideshow together, you have a few options.
Share your slideshow as a PowerPoint presentation saved to OneDrive or as a PDF. Just click the Share button from the menu on the upper right corner. Then, invite others in the sidebar that opens, send the slideshow as an attachment, or obtain a link to share.
Let others make notes on the presentation with the Comments button which is right next to the Share button on the menu. (Assuming your collaborators open the presentation in PowerPoint.) You can view their comments, pop in a reply, move, and delete comments.

View the version history once you start collaborating. If your collaborators are able to make edits to the presentation, you can see the previous versions. A button will appear in the menu in between the Share and Comments buttons. You can then open previous versions of the slideshow if needed.
Slideshow Options
Once your presentation is complete, it's time to review and set up your slideshow. Head over to the Slide Show tab and check out the following options.

Start Slide Show
- From Beginning: Watch your slideshow from the first slide as your audience will see it.
- From Current Slide: Watch your slideshow start from the slide you select.
- Present Online: Use the Office Presentation Service to view your slideshow in a browser.
- Custom Slide Show: Create a custom presentation with the slides in a particular order.
Set Up
- Set Up Slide Show: Choose the show type, show options, which slides to display, how to advance the slides, and any multiple monitor options you need.
- Hide Slide: This hides any slide that you select from the presentation.
- Rehearse Timings: You can practice presenting your slideshow and see the amount of time you spend on each slide and the slideshow in total. You also have an option to save your timings which is helpful for improving the presentation time if needed.
- Record Slide Show: Easily record your slideshow from the beginning or a specific slide. This is ideal for distributing to others who could not attend the presentation.
- Enable or Disable narrations, timings, and media controls with the convenient checkboxes.
Monitors
Select a connected monitor from the dropdown box for where your presentation should display. You can also enable or disable Presenter View.
Presenter View provides you with a different view of your slideshow. This allows you to see your presentation with speaker notes on one screen while your slideshow displays on another. In addition, you can control your presentation in this view.
- Change the display settings or duplicate the slideshow.
- Access tools like a laser pointer, pen, or highlighter to use throughout your presentation.
- Zoom in on a slide.
- Black or unblack the slideshow.
- Advance to another slide.
- End the slideshow.

Start the PowerPoint Slideshow
Once you have the above options set for your slideshow, have rehearsed it, and are ready to start, the rest is easy.
Open PowerPoint on your computer, select which monitor to use, and then present it. You can start the slideshow with either the From Beginning button on the Slide Show tab or with the Start from Beginning button on the Quick Access Toolbar. This is the same process you would have followed when you reviewed your presentation.
If you decide to use the Presenter View during your slideshow, then you already know the tools you have at your fingertips to control the show. But if you choose not to or are only working with one monitor, you can still maneuver your presentation.
Simply right-click on the slideshow once it begins to open the context menu. You can then see all of the slides, zoom in, adjust the screen or printer options, and end the show.

Design With Powerpoint Templates
One final part of this beginner's guide is the templates you can use to boost your productivity in PowerPoint. Using a template, you can get a head start on your presentation. PowerPoint offers a variety of built-in templates and you can find those from online third-parties.
Use Featured PowerPoint Templates
To view options within PowerPoint, click File > New. You will then see a number of featured templates you can use along with categories you can pick from and a search box if you want something in particular.

The built-in templates range from basic business cards and diagrams to lengthy and detailed presentations for most any industry.
If you see a template you would like to check out, click on it and then review its description and download size in the popup window. If you want to use it, click the Create button.


Comments
Post a Comment